

 Aug 22, 2026
  5 min read
A WordPress bidding plugin lets your customers place bids on products instead of just buying them outright, turning your store into an auction site. If you’re running an e-commerce site and want to increase engagement or test auction-style sales, you need the right plugin to handle automated bidding, bid notifications, and payment processing. Here’s what actually works, what to avoid, and how to set one up.
A WordPress bidding plugin is a tool that adds auction functionality to your WooCommerce or custom store, letting customers place bids on products over a set time period. The plugin manages bid increments, notifies users of outbids in real-time, and automatically closes auctions to trigger payment from the highest bidder. Most plugins integrate with WooCommerce and popular payment processors like Stripe or PayPal.
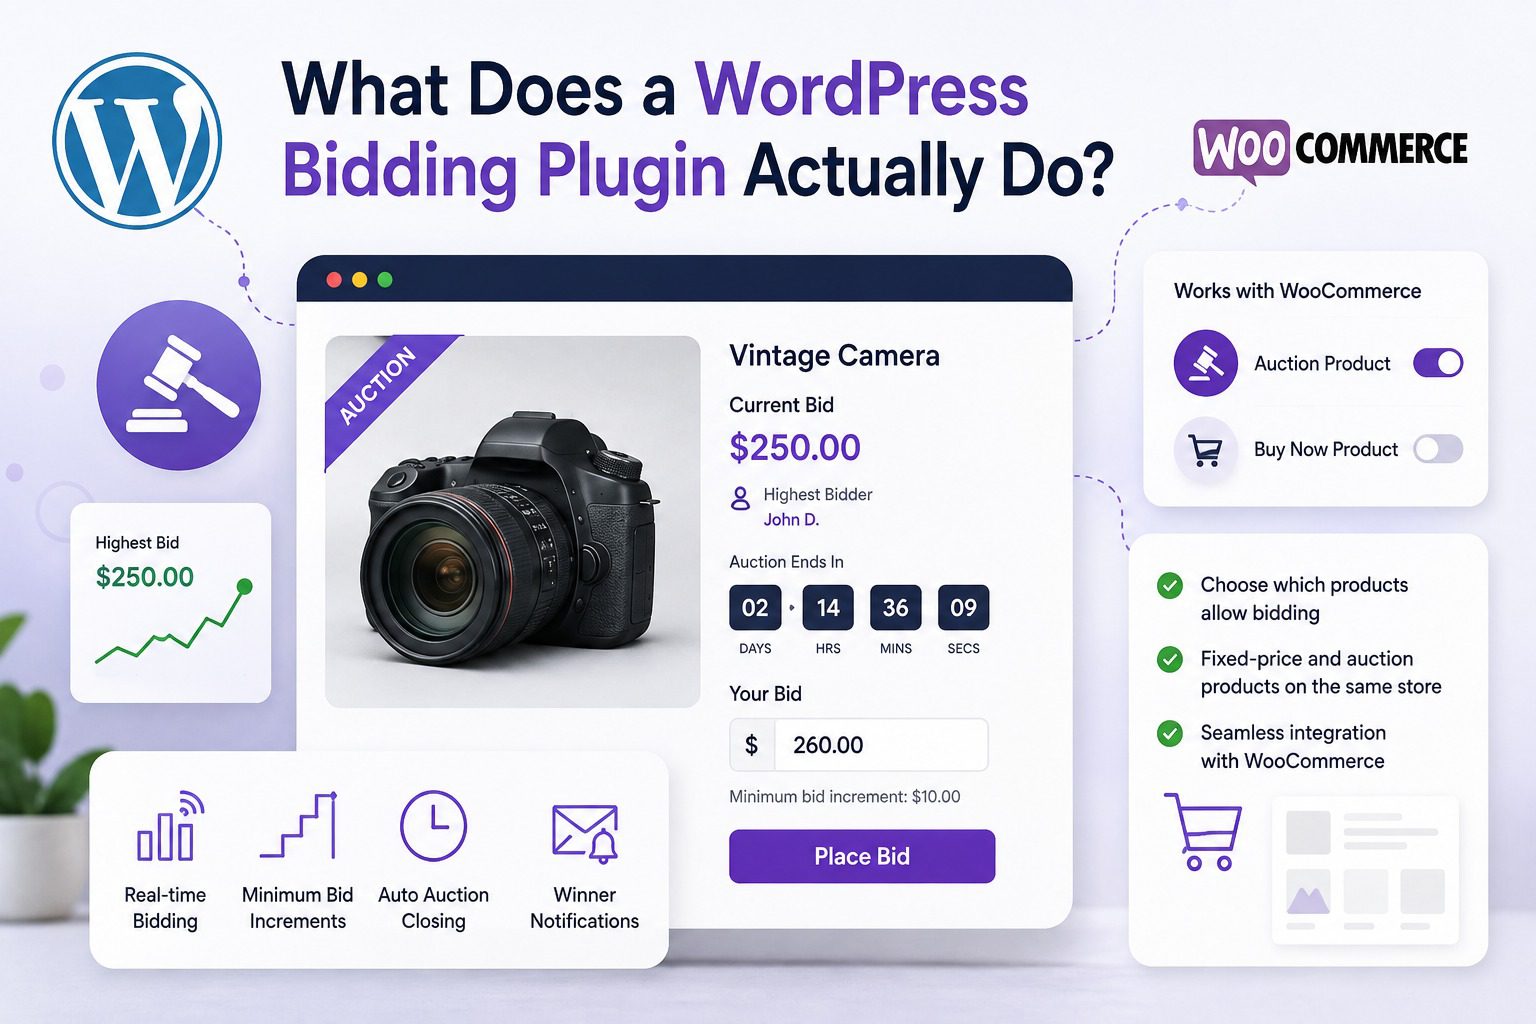
A bidding plugin adds auction functionality on top of your existing WordPress site. Instead of a fixed “Add to Cart” button, visitors see a current bid, a countdown timer, and a field to place their own bid.
Under the hood, the plugin handles the parts you don’t want to build yourself: tracking the highest bid in real time, enforcing minimum bid increments, closing the auction at the right time, and notifying the winner. Most plugins also support proxy bidding, where a buyer sets their max bid once and the system bids on their behalf up to that limit.
If you’re running WooCommerce, a good bidding plugin plugs directly into your existing products rather than forcing you to build a separate auction catalog. You pick which products allow bidding and which stay fixed-price, and both can run side by side on the same store.
Fixed pricing works fine for products where value is obvious and stable. Bidding works better when value is uncertain, competitive, or tied to scarcity, and it can pull in revenue a fixed price would leave on the table.
A few concrete reasons stores add it:
Limited or one-off inventory. If you’re selling something with only one unit, like a collectible, a piece of art, or a custom item, bidding lets the market decide the price instead of you guessing.
Clearing aging stock. Items that have sat unsold at a fixed price sometimes move fast once buyers see a live auction with a countdown. The urgency does work a static price tag can’t.
Building engagement. A countdown timer and a live bid count keep visitors checking back, which means repeat visits to your store that a normal product page doesn’t generate. [PLACEHOLDER: real engagement or return-visit numbers if you have them]
Price discovery. For items where you genuinely don’t know what the market will pay, an auction finds that number for you instead of leaving money on the table with a guess.
1. Install a bidding plugin. From your WordPress dashboard, go to Plugins > Add New and search for Auction Plugin. Activate it like any other plugin.
2. Connect it to your store. If you’re on WooCommerce, the plugin should detect your existing products. Choose which ones you want to enable bidding on. [PLACEHOLDER: screenshot of the product-level bidding toggle]
3. Set your bidding rules. Configure the starting bid, minimum bid increment, auction duration, and whether proxy bidding is on by default. [PLACEHOLDER: screenshot of the rules panel]
4. Set a reserve price if needed. This is the minimum price the item has to reach before it actually sells, and it stays hidden from bidders.
5. Connect payment. Link Stripe or PayPal so the winning bidder can pay immediately when the auction closes, without you chasing them down manually.
6. Publish and test. Place a test bid yourself before announcing it live, so you catch any formatting or timer issues early.
Most stores have their first bidding-enabled product live the same day they install the plugin.
Bidding doesn’t automatically make you more money. It changes how you make it. On items where demand is genuinely competitive, an auction can push the final price above what you would have set as a fixed price, since buyers push each other up instead of settling on your number.
On items with little competition, though, an auction can close below what you’d have gotten from a fixed price, since there’s no bidding war to drive it up. This is why reserve prices matter. They protect you from a low-demand auction selling for far less than the item is worth.
[PLACEHOLDER: real revenue comparison, e.g. “Auction listings on X store closed at an average of Y% above the fixed price for the same category”]
The honest takeaway: bidding is a tool for specific situations, not a universal upgrade. Use it where scarcity or uncertain value work in your favor, and keep fixed pricing where it already works.
Bids not updating in real time. Usually a caching plugin conflict. Exclude the auction page from your caching plugin’s rules, or use a real-time bidding feature if your plugin offers one.
Bid sniping. Buyers placing a winning bid in the final seconds to avoid getting outbid. Fix this by enabling auto-extend, which adds a few minutes to the auction whenever a bid comes in near the end.
Payment not going through after the auction closes. Usually a payment gateway API key issue. Double check your Stripe or PayPal keys are correctly entered and not expired.
Low bid activity. Often a starting price set too high, or an auction duration too short for buyers to notice it. Try a lower starting bid and a longer window, at least a few days for lower-traffic stores.
Reserve price never getting met. This usually means the reserve was set above what the market will actually pay. Check comparable sold listings before setting it. [PLACEHOLDER: mention any built-in tool your plugin has for reserve price suggestions]
Adding bidding to WordPress isn’t a redesign, it’s a plugin install and a few settings. Start with one or two products where scarcity or uncertain pricing actually work in your favor, and see how they perform before rolling it out further. Install Auction Plugin and turn on bidding for your first product today.


Nitesh Singh is an e-commerce software architect and the Founder of Inception Software LLP. He has 16+ years of software engineering experience and has been building dedicated auction extensions for the WordPress and WooCommerce ecosystems since 2014. Connect with Nitesh on LinkedIn to track his latest developments in automated bidding tech or read his setup guides on the site.
More articles by Nitesh Singh →


 Easy Setup
 5 Star Support